Introduction:
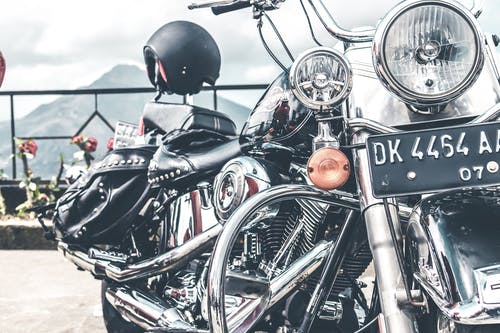
Leather motorcycle clothing is a type of long-term companionship. Items made of leather do not fade easily and may be used for a long time. Despite the fact that it cannot be denied, all leather motorcycle gear needs periodic cleaning and conditioning.
How much dirt and bad weather your motorcycle leather gears are exposed to is determined by your riding habits. You must take care of your leather gear if you want it to last as long as possible.
Despite the fact that leather is a natural fiber or material, it is not destroyed by washing or conditioning unless you’re doing it incorrectly. Leather-obsessed motorcycle riders, here is the guide for you. Keep your motorcycle leather jacket, leather pants, or even leather saddlebags clean and new-looking.
Three Stages of Cleaning and Conditioning Motorcycle Leather Gear:
Stage 1: Cleaning the Interior:
Leather is a natural product that is obtained from natural sources. Even though it is inherently warm, leather is traded immediately from deceased animals. Genuine leather motorcycle gear might cause excessive sweating. The inside lining of most leather items, such as leather jackets, is installed. It keeps you warm and protects you from the elements in extreme weather conditions. You sweat while riding.
Although leather does not allow air to enter through it, it is stinky inside the jacket since your body releases oils and salts when you sweat. You can apply the cleaning products to the inside of your leather goods. It will remove the odor as well as all other unwanted elements without causing any harm.
Leather cleaning goods can easily obtain from the market close to your home.
Steps:
Put out the removable interior:
To clean and freshen your leather motorbike jacket from the interior, remove the detachable lining.
Air it out:
It is a critical step, especially for the underarm area, which has to be aired out, to allow air to travel through and eradicate odor-causing substances.
Apply De-salter:
Sweating is natural, however, it contains bacteria, oils, and salts that your body releases. De-salter aids in the destruction of harmful components while also keeping the interior of your leather motorcycle gear clean and tidy.
Stage 2: Cleaning the Exterior:
The process of cleaning the exterior of leather gear is really challenging. The exterior of your motorcycle leather gear is exposed to the elements more than anything else, whether it is dust or severe weather. Although most motorbike leather gears are weather-resistant, undesirable factors such as dust and rain can still cause damage to their exterior.
Although motorcycle leather gear is subjected to a great deal of abuse, it nevertheless requires particular attention. Destructive element grains settle on the leather gear’s surface; the lining and stitching regions are the most effective, therefore clean them with extra care. The steps for cleaning the outside are as follows:
Steps:
Find a quality leather cleaner:
If you own leather gear, you should be aware of all that goes with it. Find a high-quality leather cleaner that does not contain damaging ingredients like silicon or waxes, which can cause the leather to dry out. Furthermore, avoid using animal-based items like mink oil paste since animal byproducts may stain the leather.
There are a variety of products on the market that are specifically designed for your leather gear. Find the correct product to keep your leather motorbike gear alive.
Use a small amount of cleaner:
Do not worry if the jacket is in large size; there is no need to use a lot of cleaners. Applying more cleaner will not give additional cleaning; instead, it will take longer to dry and can damage the color of the leather.
Use a minimal bit of cleaner to get the job done. Another thing to remember is not to use the cleaning on the leather gear directly. Apply a tiny amount of cleanser on a clean piece of cloth that will serve as an applicator to the leather gear’s outside surface.
Apply cleaner to the leather gear surface:
Do not be in a hurry to clean your leather gear; it takes time. So, hold your nerves and wipe the cleaner all over the surface in a circular motion gently to remove the dust from the pores.
Let it dry:
Allow for about a half-hour of drying time, or until the leather is totally dry. Your leather motorbike gear is now clean and dust-free. But there is still something lacking, the glimmer that reveals a leather jacket’s liveliness.
Conditioning:
Conditioning is the final step in the process of cleaning leather motorcycle gear. It aids in restoring the leather luster and vibrancy. The leather gear appears to be brand new after conditioning. There are certain conditioning steps as well:
Apply Leather Conditioner:
The next step in this stage is to apply a leather conditioner. Make sure the leather is completely dry and there is no sign of wet cleaner is present.
With the help of a sponge, apply a leather conditioner to the leather gear’s surface. Apply a small quantity of conditioner to the sponge before rubbing it over the leather gear. It is up to you to decide where to begin, but do not forget to apply it everywhere.
Now just sit back and wait for it to dry. It will take some time, depending on the temperature. Your jacket will be ready for extended travel after it has dried.
Don’t over-condition:
The final stage in the leather conditioning procedure is to keep in mind that it should not be done too frequently. This is due to the fact that too much oil on the jacket might cause it to discolor. It can also block the pores of the leather, causing the leather to wear down prematurely. Conditioning leather motorcycle gear only once, and no more than twice a year, is a decent thumb rule.
Conclusion:
A motorbike enthusiast’s essential requirement is motorcycle leather gear. They protect you in the shape of leather coats and pants, and they keep your belongings safe as leather saddlebags. You cannot deny their company; take excellent care of your leather gears, and they will keep you safe on your exciting adventures.


